SI-CRE-TOOL11 Update Project Cost Codes
Applies to
- Product version: Velixo NX
- ERP: Sage Intacct
- Functional area: Project, Other
- Industry: Construction
- Plan: All
- Template type: Production Report template
Description
The SI-CRE-TOOL11 Update Project Cost Codes template is a tool Template designed for the construction industry to efficiently update project cost codes data from Excel directly in Sage Intacct. This template simplifies the process of managing and updating cost codes, ensuring data quality and facilitating data entry in bulk.
Important: As this template enables bulk updating of Project Cost Code records, please always check your modified data prior to writing data back to Sage Intacct.
Coverage
This workbook includes the following sheets:
Update Project Cost Codes: the primary template for updating project cost codes. It includes writeback functionality to execute mass updates from the template directly into the Sage Intacct instance.
Options: the template’s settings sheet that is used for data validation lists and various lookups and configurations.
Information: the information sheet of the report, used for storing useful details about the report such as code, version, and article link to keep track of the origin of the report.
Typical audience
The typical users of this type of report are Finance professionals: Accountants, CFOs, Controllers and Project managers.
Features
The following features are used by this report. To use this report, please ensure that your Velixo license includes all of them, (or contact Support or Sales):
- List functions
- Generic Inquiry / Query functions
- Writeback function
Preview
Download this template

💡Having trouble downloading this file?
Simply right-click on the link and select Save link as
Documentation
Navigating and utilizing the SI-CRE-TOOL11 Update Project Cost Codes template is straightforward, designed for simplicity, versatility, and efficiency. This template is tailored for the construction industry, enabling users to efficiently update project cost codes with ease. Featuring writeback functionality, it allows for seamless mass updates directly into the Sage Intacct instance.
Filters
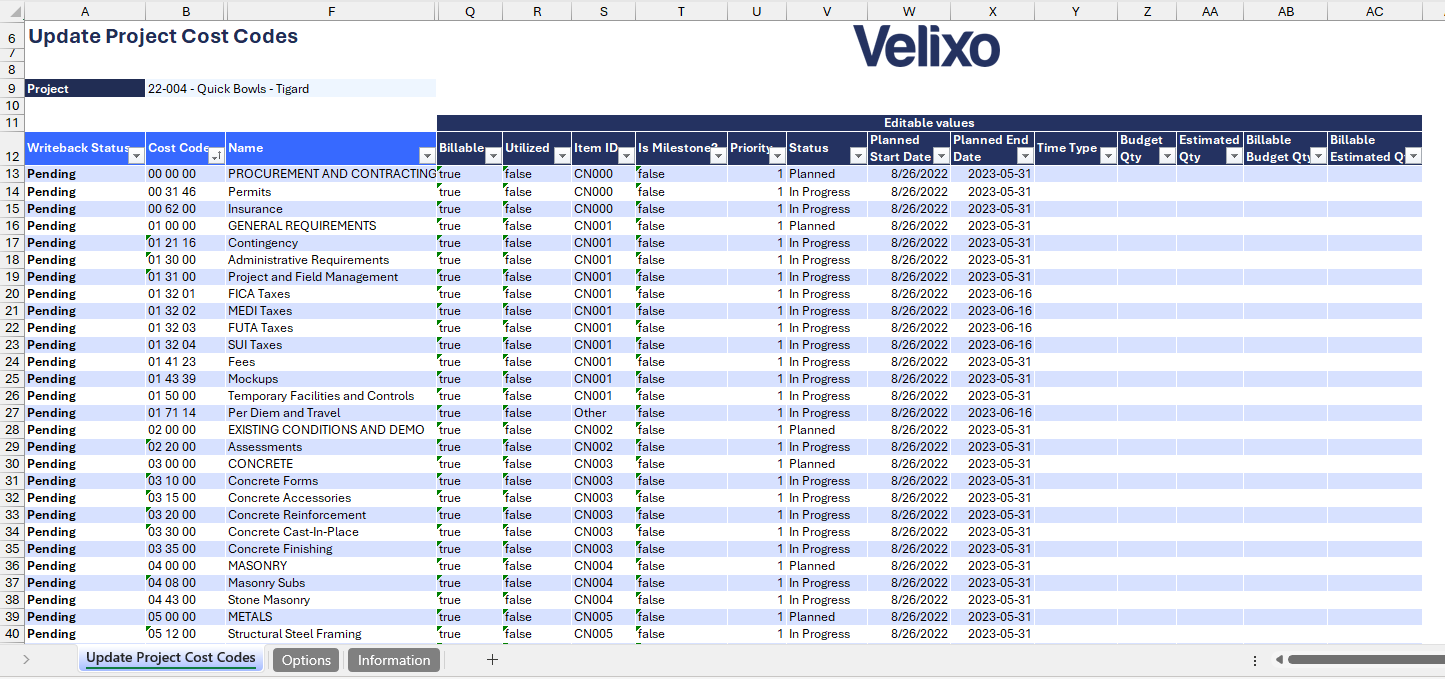
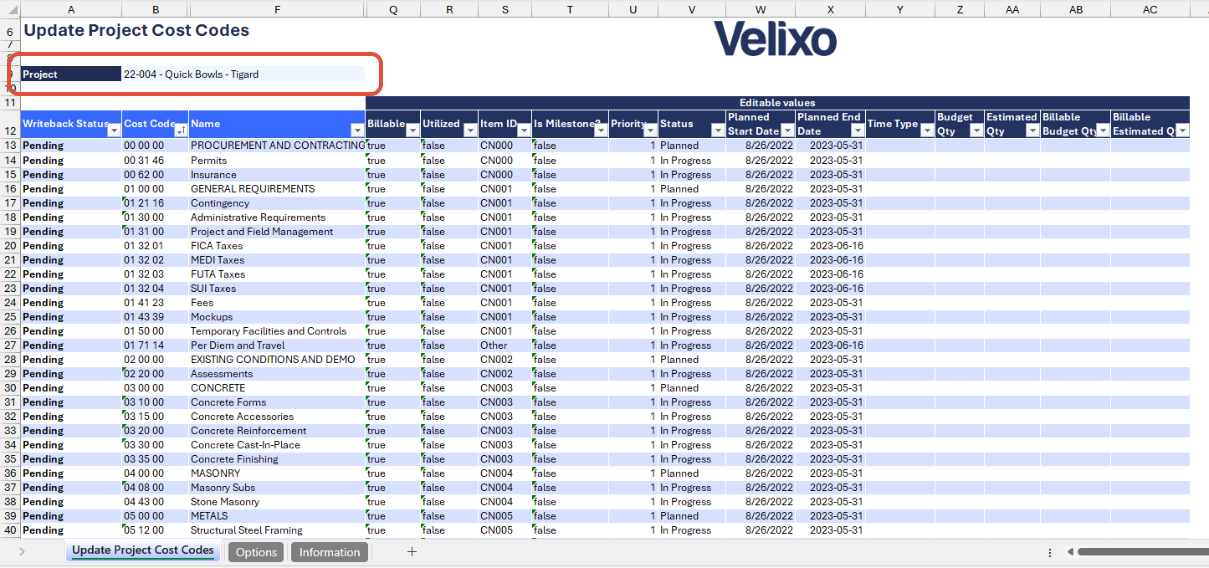
Located in the upper left of the sheet, the filters include:
- Project: a dropdown list of all available projects in the Sage Intacct instance and serves as the sole filter in the template. If no project code is selected, the template will display all available project cost codes within the Sage instance.
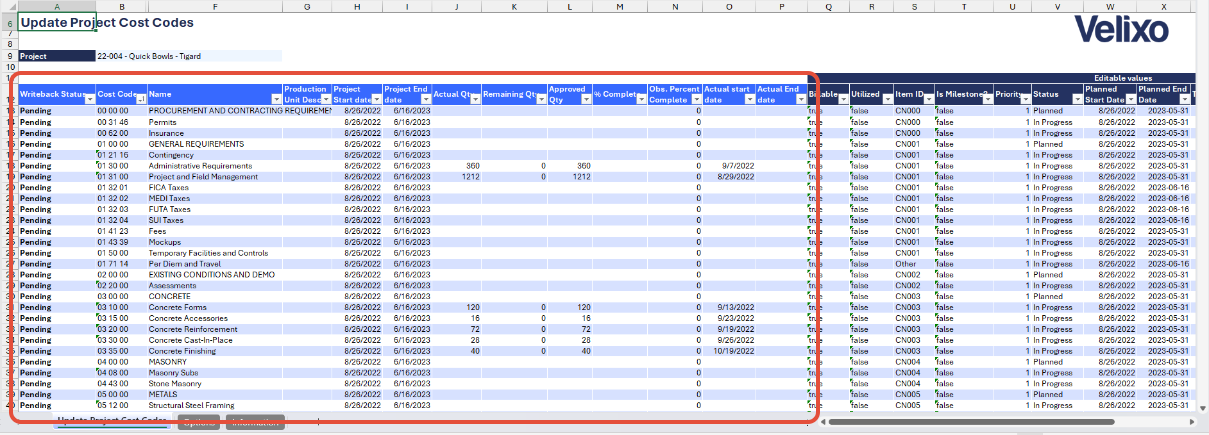
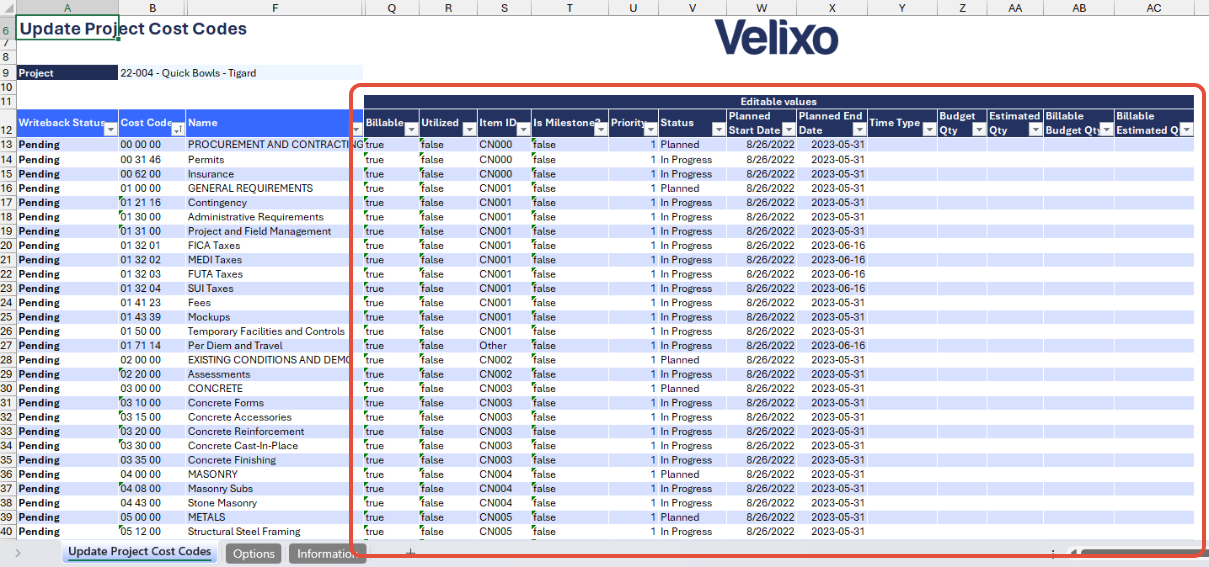
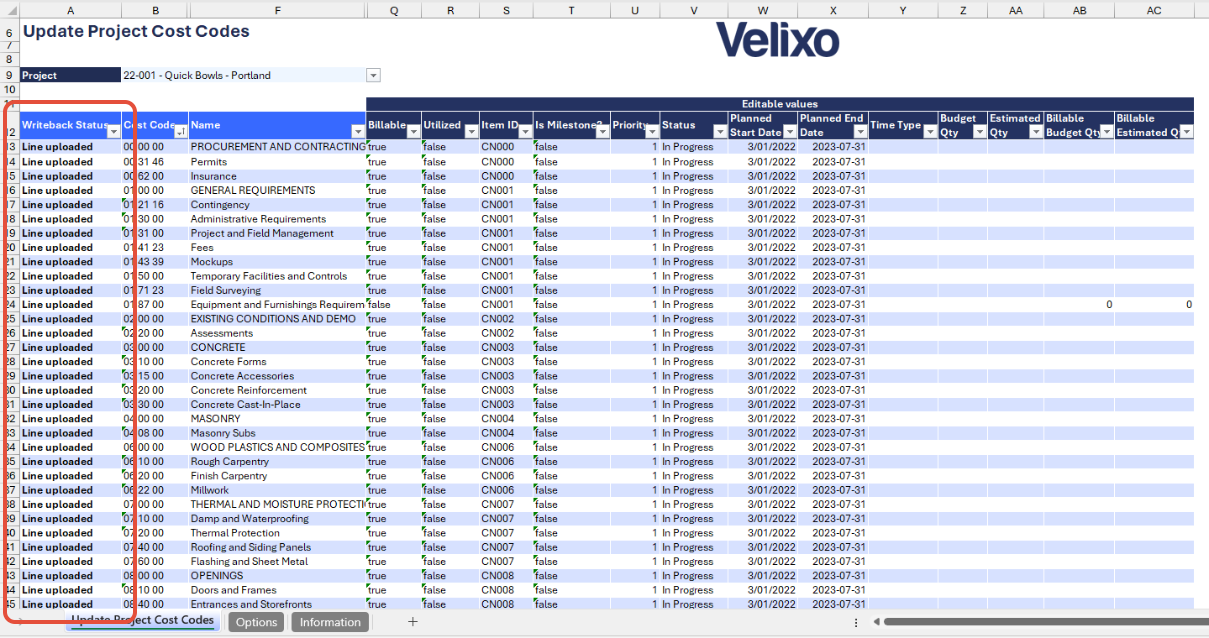
Data Table
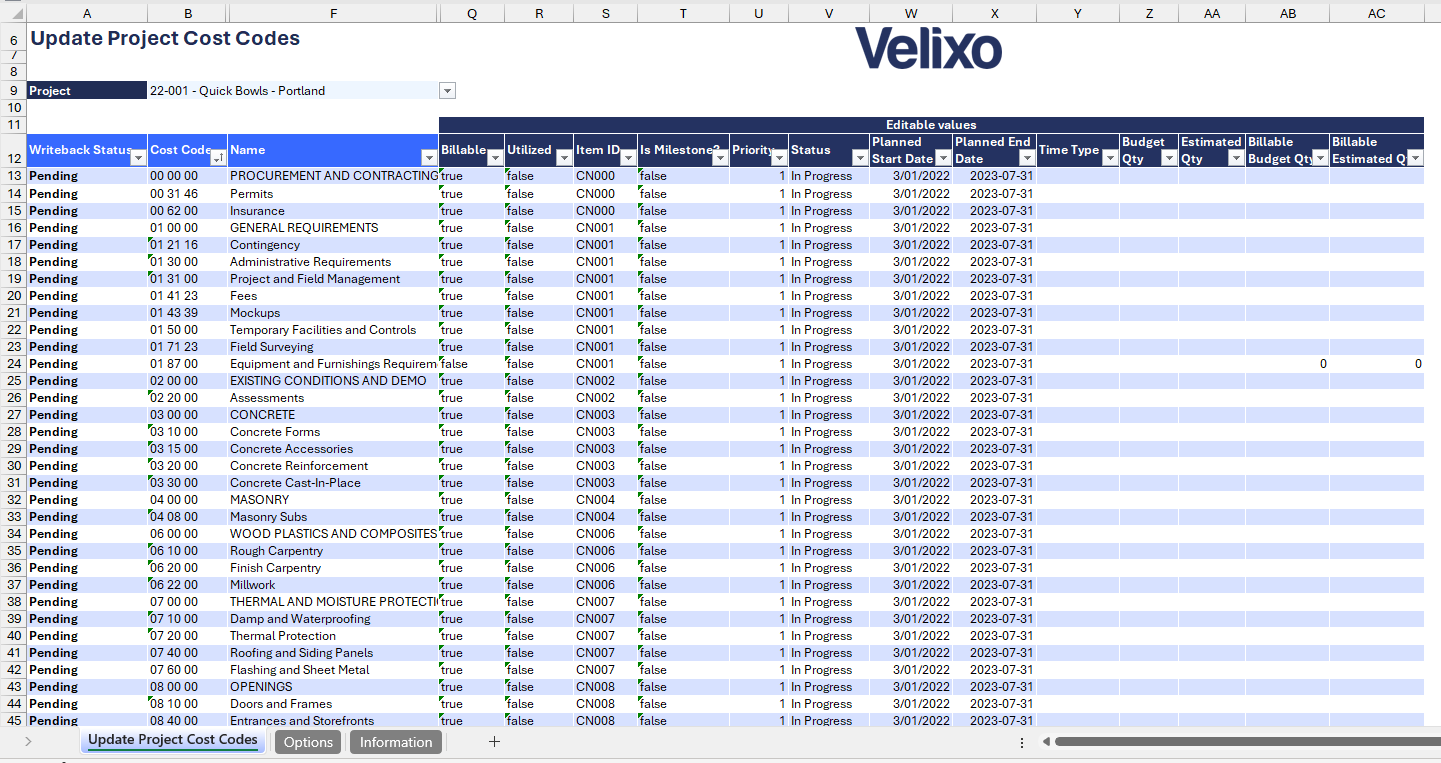
To ensure a seamless writeback process to the Sage Intacct instance, the template includes a data table divided into two categories:
- Read-only data value: this category includes data that cannot be edited, ensuring critical information remains accurate and consistent. The column headers for this data are distinguished in blue for easy identification. To view all available attributes of a cost code more comprehensively, users can collapse the grouped columns in Column Q.
- Editable data values: this category includes data that users can change as needed, providing flexibility within the template. The column headers for this data are highlighted in dark blue. The editable data values mirror the format used in Sage Intacct record forms, ensuring users are familiar with the interface.
User Guide
Using the report
Now that we've covered the report overview, let's dive into a step-by-step guide on effectively utilizing the report.
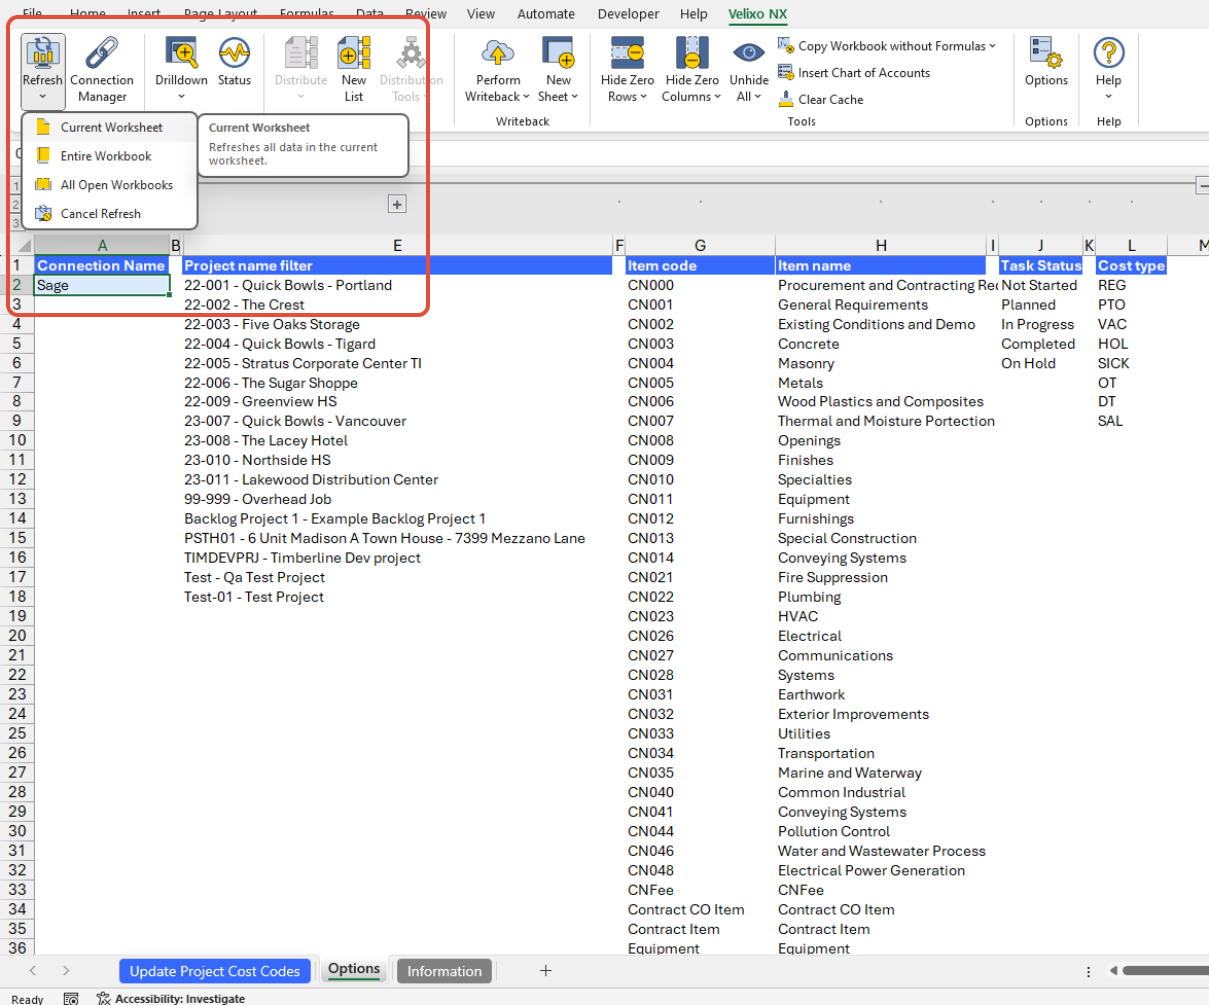
- Set the Connection Name on the Options sheet: crucial for all processes, set the Connection Name on the Options sheet by updating cell A2. Ensure it matches the name used during Velixo application login.

- Update the Options Sheet: as the foundation for the filters on the main report, keep the Options sheet up to date. It should always and automatically capture the latest dimensions and structures from your Sage Intacct instance.
- Navigate to the main sheet and choose the project for which you want to update the project cost codes.
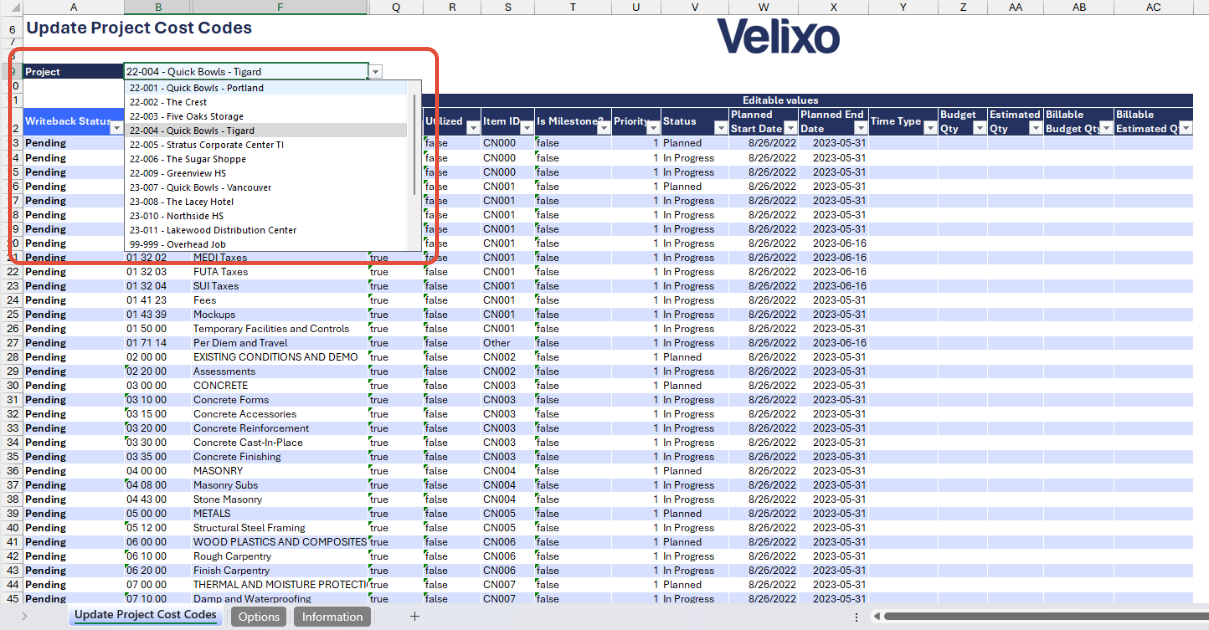
- Selecting a project will automatically update the table. Modify or update the existing details in the editable columns as needed.
- Once you've updated the table, initiate the Velixo writeback process.
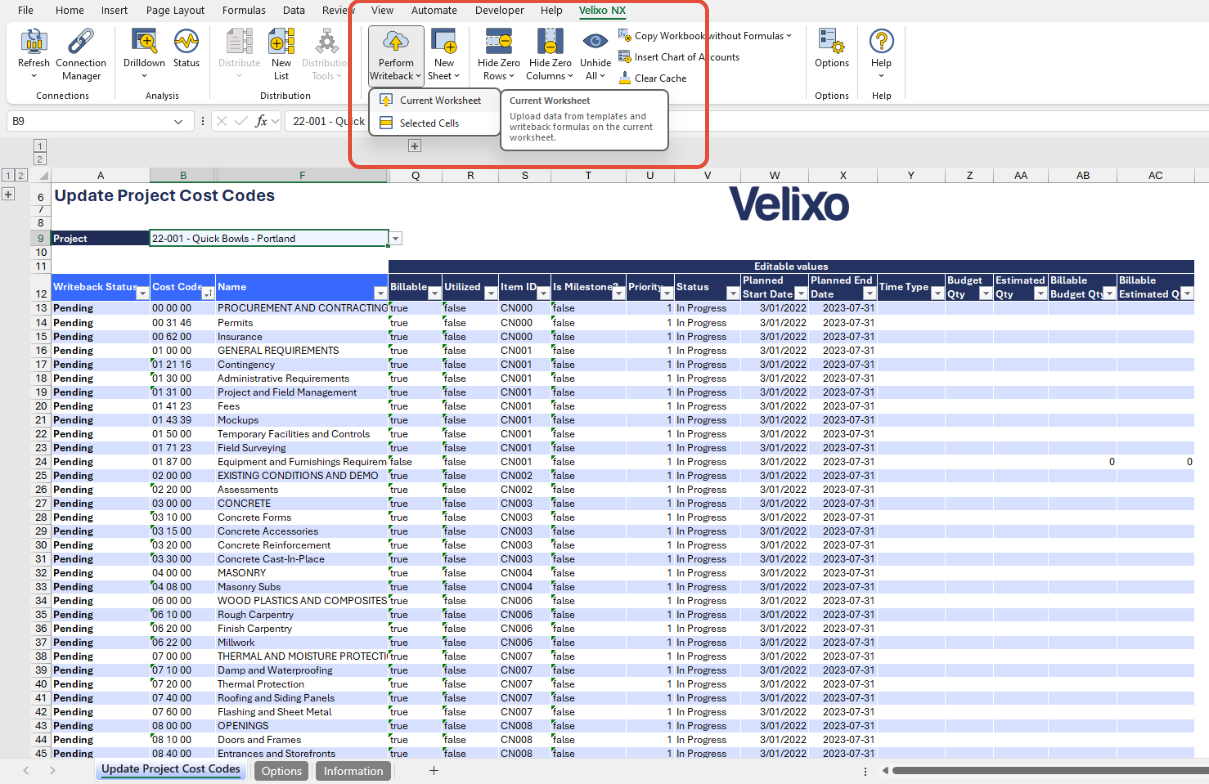
- After a successful upload, the status in Column A (Writeback Status) will change to 'Line uploaded'.
Important: To prevent Velixo from uploading blanks when details in editable values are removed, ensure you only update necessary project codes and their attributes. Leave unchanged items as they are.
Version History
| Version | Released on | Changes |
| 1 | August 23, 2024 | N/A. Initial version of this template. |